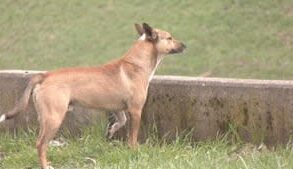


Leaving your dog inside while you’re at work for eight or nine hours can drive your furry friend crazy. My Siberian husky would get into all kinds of trouble when he had the run of the house. So I built him a dog kennel – an enclosed backyard space with enough room for him to burn off energy without escaping.
The process is relatively straightforward and requires few tools.
Let’s begin with the basics:
What material do I need for a dog kennel?
- Dog kennel with cover
- Gravel
- Cinder blocks (8 inches by 8 inches by 16 inches)
- Wooden stakes
- Mason twine
- I-beam level (40 inches or longer)
- Long-handled, flat-blade shovel
- Crescent wrench or socket wrench
1. Find the right dog kennel site
This may seem obvious, but good site selection can mean the difference between a single workday and an entire holiday weekend.
The ground doesn’t have to be perfectly level, but it should have a consistent grade to minimize the digging you’ll need to do. Your site will also determine how big a dog kennel you can build.
I purchased two dog kennels measuring 15 feet by 5 feet. I used their backs as additional siding. Then I assembled them into a single long space of 35 feet by 5 feet so my dog had room to run.
You should measure the available space so you know how big a kennel will fit.
2. Order your kennel
Online shopping is the way to go. Most hardware stores will only stock one, maybe two products, while your choices online are vast enough to overwhelm you. I chose a kennel whose sides were chain-link fencing.
3: Prepare the kennel site
Owners with the rare dog that doesn’t dig (I hear they exist), can skip ahead and assemble the kennel. But I needed to take an extra step.
After speaking with my husky’s breeder and a contractor, I decided to build a kennel consisting of a gravel track surrounded by buried cinder blocks that would prevent my dog from digging his way out of the enclosed kennel.
I started by taking wooden stakes and mason twine and measuring out the area where the kennel would be. Because I wanted the kennel to sit on the edges of the cinder blocks, I measured out an area that was 8 inches wider and 8 inches longer than the kennel.
The contractor who advised me suggested I dig down 4 inches before placing the cinder blocks inside the perimeter of the dig, forming the base on which the kennel’s siding would sit. I went down 6 inches because Siberian huskies love to dig.
4. Dig and level
Now, grab the flat-blade shovel. Get one with a long handle, so you’re not stooped over. It’s also important to get one with a good step, the top edge of the blade where you can comfortably place your foot to add pressure for digging.
Once you near your target depth, drive two stakes into the ground and run twine from one to the other. Use the level to make sure the twine runs true. The flat-blade shovel will make it easy to level the dirt. I moved the stake and twine along one-foot increments, using the ruler on the level to check depth as I went along.
Interested in more tips for your home? Check out USA TODAY Home Improved for home and garden project advice.
5. Place your cinder blocks
Place the cinder blocks. I ran two stakes with twine at the target height of the tops of the cinder blocks to help guide placement and check the tilt on the blocks. I had to do some touch-ups to make sure the blocks were level and even.
6. Pour your gravel
I laid out 50-lb. bags of gravel over the area I defined for my kennel. Then I sliced them open and poured the gravel in place. That ensured the distribution of the gravel was even. Because I went 6 inches deep, I had to lay down a second layer of gravel. One 50-lb. bag of gravel will cover 2 square feet to a depth of 3 inches. The smaller the gravel, the easier it will be on your dog’s feet. Online calculators will help you determine how many bags you need.
7. Assemble
Assemble your kennel. Most require a minimum of tools, often no more than a socket wrench set or a crescent wrench. Begin by assembling two panels that form a corner, then add on from there.
Story continues below.
8. Add your cover
I’ve rarely met a dog that couldn’t jump higher than you’d guess. Make sure your kennel comes with a cover, and be sure to install it.
What is the cheapest way to build a dog kennel?
- Kennel: $400-$800 (like anything, you can spend thousands for fancier ones)
- 28 cinder blocks: ~$80
- 110 bags of gravel (55 cubic feet): $550-$650
- Wooden stakes: $8
- Mason twine: $6
- I-beam level: $20
- Flat-blade shovel: $30
- Crescent wrench: $25
Total cost: $1,119-$1,619
This post was originally published on this site be sure to check out more of their content.